Vouchers#
Vouchers are codes which can be redeemed for certain products in your shop. pretix allows you to automatically generate these codes as well as associated URLs and send them out via email. Vouchers have several useful applications. You can use them to:
- make products available at a reduced price for voucher holders
- make a product available or even visible only to a select group of people (such as speakers at a conference or invited guests)
- reserve a certain quantity of a product quota for voucher holders
- make sure that voucher holders still have access to a product even if it is sold out
Note
Vouchers are not to be confused with gift cards. Gift cards essentially function like an additional method of payment for your customers. They always represent a fixed amount of money that is subtracted from the total of the order. Gift cards can be used across different events and organizers and do not affect the availability and visibility of certain products.
Prerequisites#
Vouchers are handled on the event level, so you first need to create the event for which you want to create vouchers. If you are using pretix Hosted, your account needs to be activated before you can send out vouchers via email.
General usage#
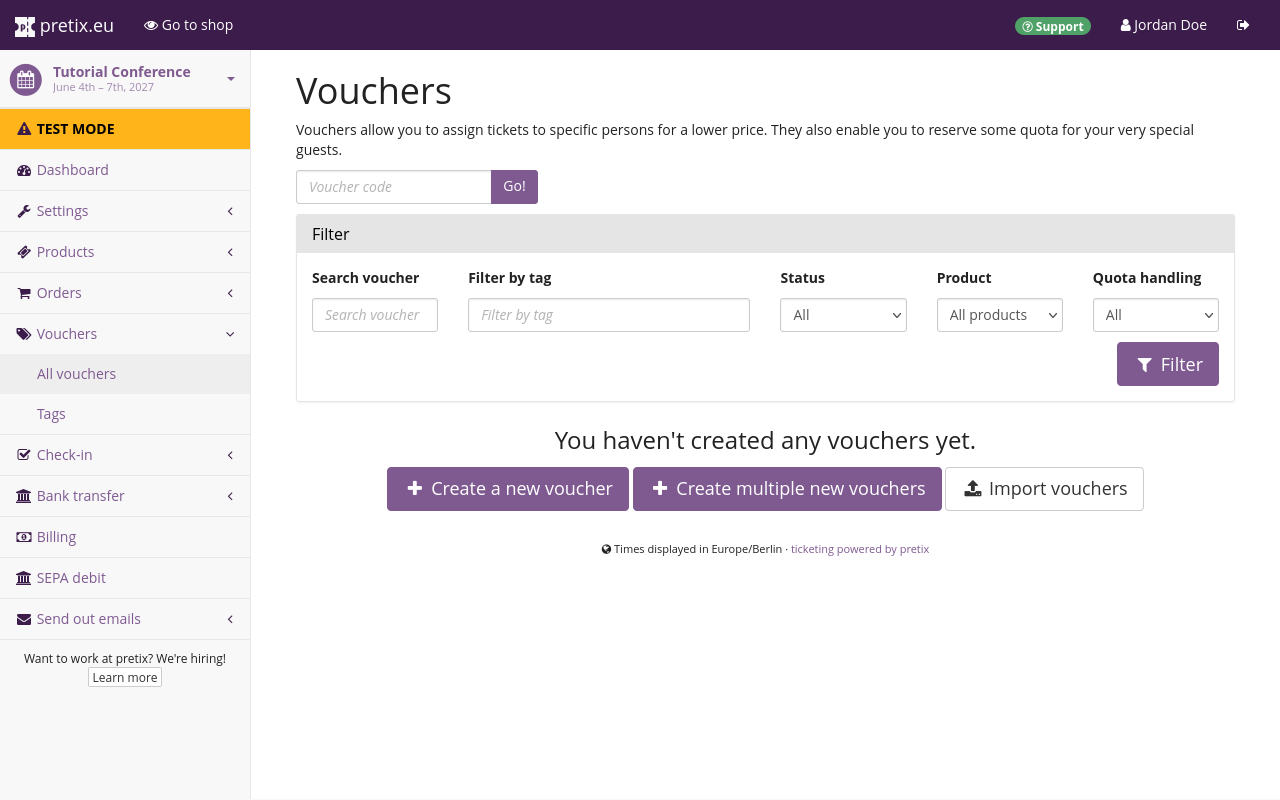
The settings page for vouchers is located at navigation pathYour event then Vouchers. It gives you an overview of all vouchers that have already been created as well as options for searching and filtering vouchers.
Creating a single voucher#
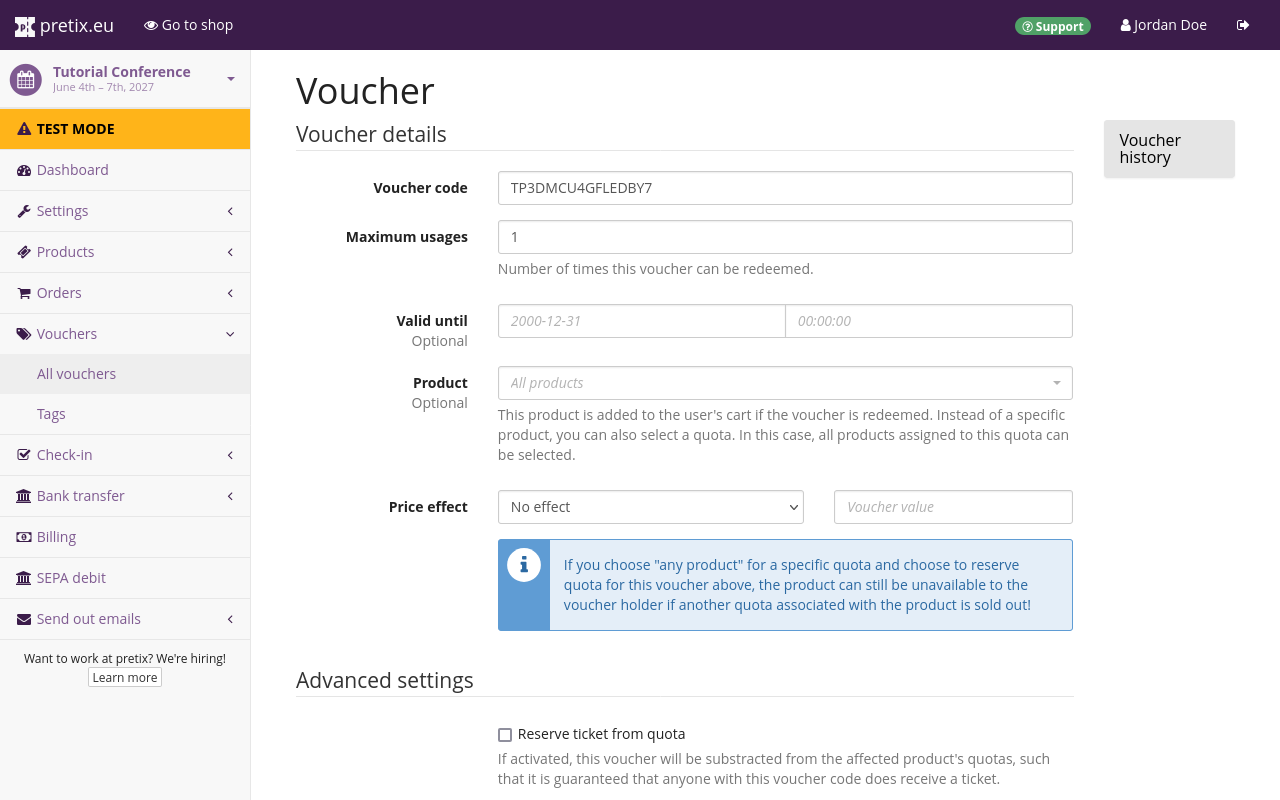
Clicking the Create a new voucher button takes you to a dialog for creating a single new voucher. This is useful for when you are planning to publish a single voucher code that can then either be used once or multiple times. The "Voucher code" field already contains an automatically generated suggestion, but you can change it and provide your own as long as it is at least 5 and no more than 255 characters in length. Any lower-case letters will be converted to upper case.
Whenever you generate one or more vouchers, it is recommended that you copy them and save them, for example in a plaintext file or a spreadsheet on your computer.
Whenever you create more than one type of voucher for an event, it is recommended that you enter a descriptor in the "Tag" field. This can make it easier to find, edit and clone certain sets of vouchers in the list. A useful entry in the "Tag" field could be the purpose for which they were created, for example, "Limited Time Offer".
The voucher will be created as soon as you click the Save button. This takes you to a new page titled "Voucher details" displaying the "Voucher link" which you can send to your customers. Opening that link will take them to the shop with the voucher code preselected and all associated products visible. All settings that are available prior to creation can also be changed after the voucher has already been created.
Creating multiple vouchers#
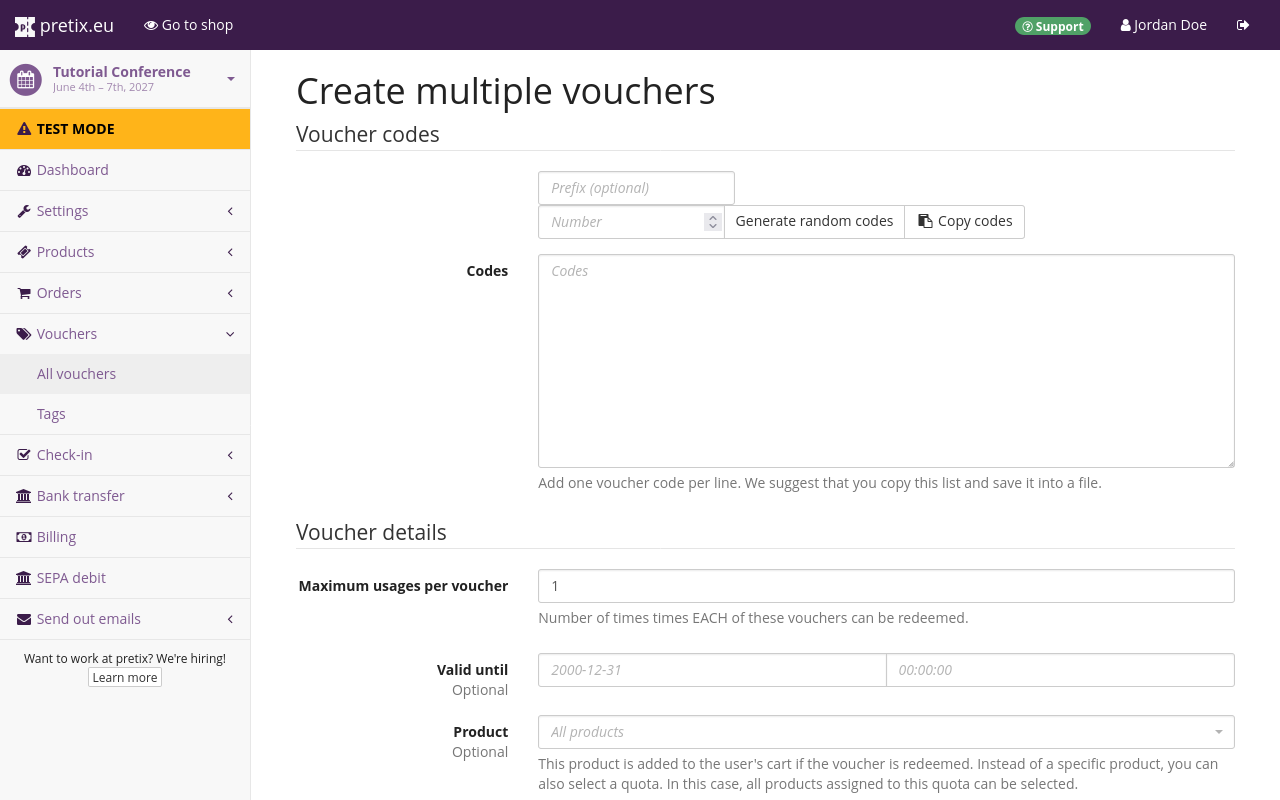
The Create multiple new vouchers button takes you to a dialog for creating multiple new vouchers. Enter the number of voucher codes you want to create in the "Number" field. If you type anything into the "Prefix" field prior to generating the codes, then each code you generate will start with that prefix. Once you click Generate random codes, the number of codes you specified will be displayed in the "Codes" field.
You may also provide your own voucher codes by manually entering them into the "Codes" field. Codes are separated by line breaks, i.e., each code must be entered in a new line.
The settings in the "Voucher details" and "Advanced settings" sections are the same as in the dialog for creating a single voucher.
It is recommended that you enter a tag in the "Tag" field, copy the codes, and save them in a text file or in a spreadsheet. If you intend to use pretix to send out vouchers via the pretix-native mail functionality, do not click the "Save" button yet, but instead refer to the subsection on sending out vouchers via email.
Once you have made your choices, click the Save button and the vouchers will be created. This will take you to the "Vouchers" overview page. You can still edit the settings for the vouchers, but you need to do so for each voucher individually.
Sending out vouchers via email#
The dialog for creating multiple new vouchers also gives you access to the email options, allowing you to send out vouchers via email through pretix instantly after creating them. Check the box next to "Send vouchers via email" at the bottom of the page to expand the email options.
The email options allow you to specify the subject line and the message content of the emails you want to send out. Each field lists the placeholders which are available for that field and comes with default pre-written content.
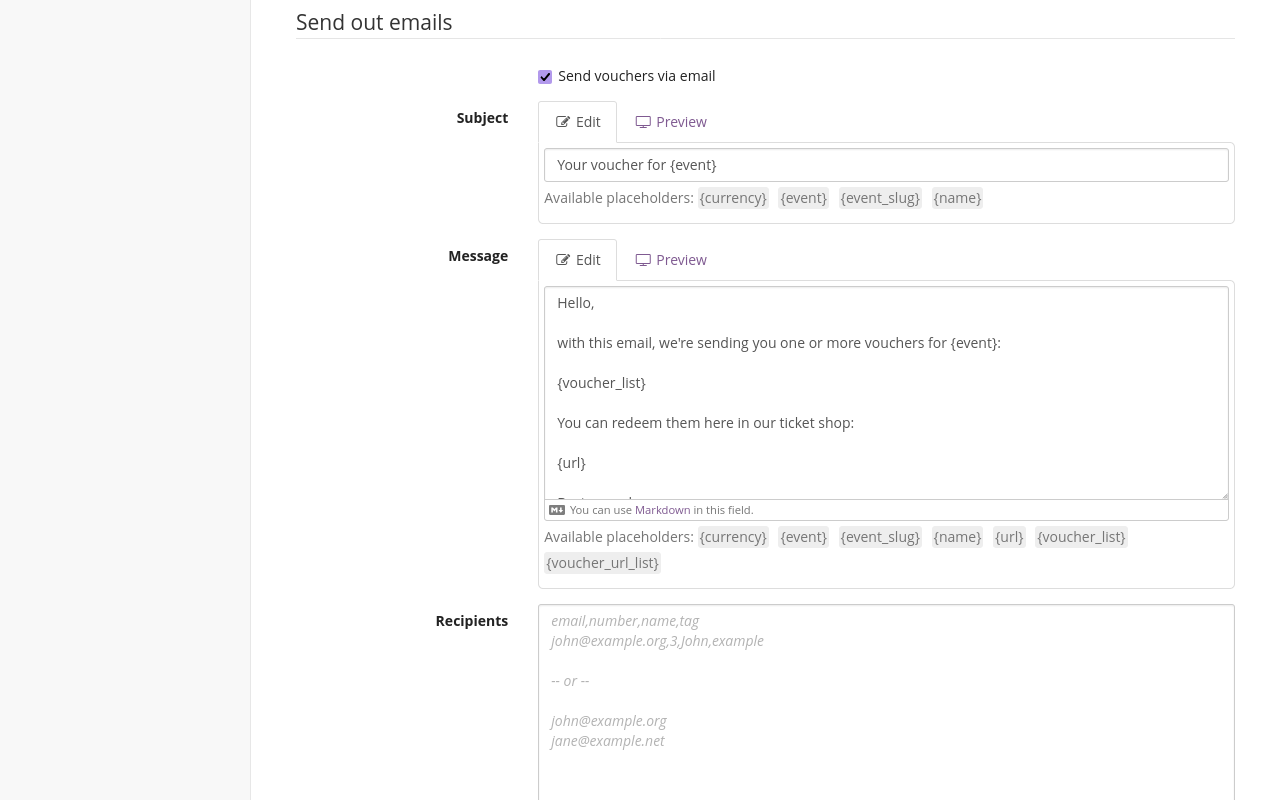
There are two methods for specifying the recipients: The more basic method is to enter a list of email addresses separated by line breaks in the "Recipients" field. When using this method, the number of email addresses (and thus, lines) must be the same as the number of voucher codes generated. If you enter the same email address more than once, then multiple emails will be sent to that address, each one containing a different voucher code.
The more advanced method is to enter a comma-separated list into the "Recipients" field with up to four columns:
- email, containing the recipient email addresses
- number, containing the number of voucher codes that will be sent to each email address
- name, the name associated with the email address; this name will be used to fill the {name} placeholder in the "Subject" and "Message" fields above
- tag, which can be used to track additional information
Enter the names of the columns you wish to populate and use into the first line, separated by commas and without spaces. Including the header line is mandatory. You can freely choose the order of the columns. Enter the contact data below, again with each email address getting its own line and any additional data going into the same line, separated by commas. In the following example, Jordan would be sent 3, Morgan 1, and Jamie 10 voucher codes:
email,number,name
jordan@example.org,3,Jordan Doe
morgan@example.org,1,Morgan Doe
jamie@example.org,10,Jamie Doe
The total number of voucher codes you are sending out with this method has to match the number of voucher codes generated. The software will display an error message if the numbers do not match. Emails will be sent out as soon as you click the Save button.
Importing vouchers#
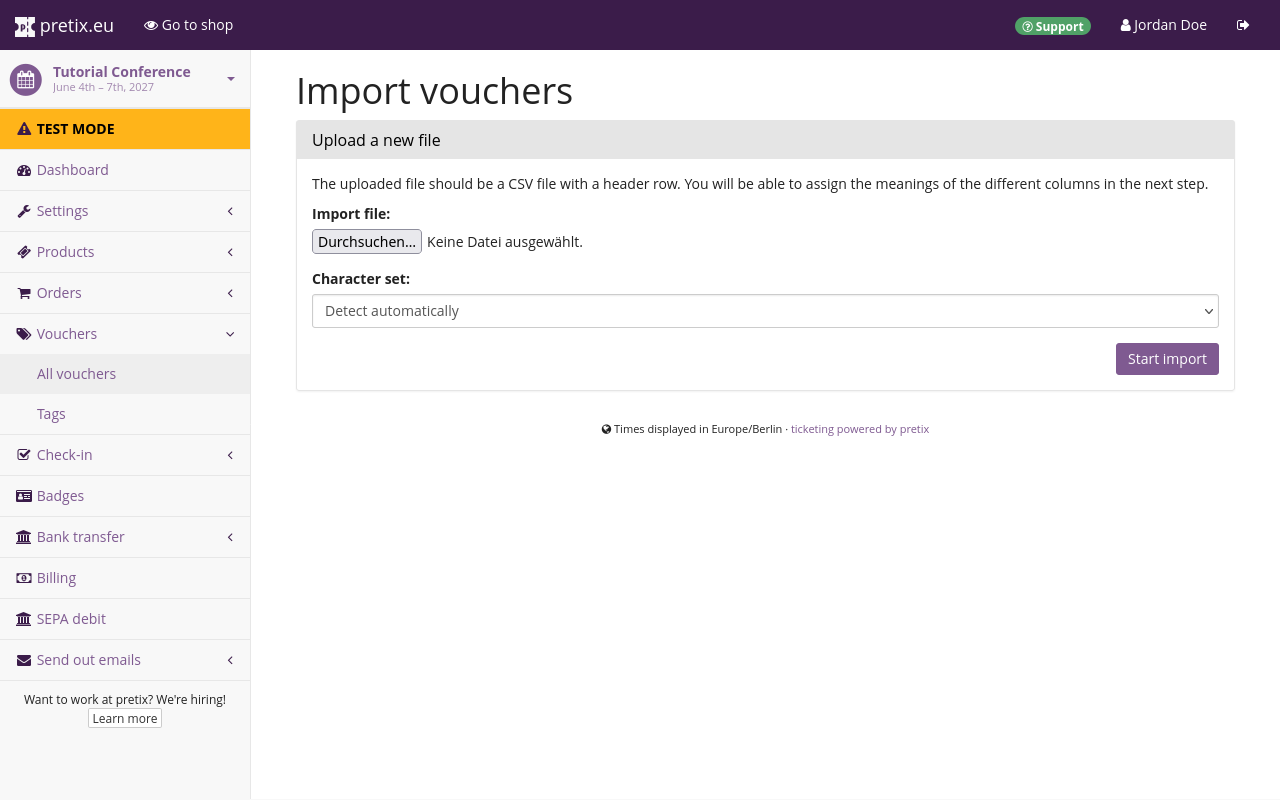
The Import vouchers button on the "Vouchers" page lets you upload a list of vouchers from an external source or one exported from a previous pretix event. Click the Browse... button, choose a .csv file with a header row, and click the Start import button. If the file can be successfully imported and parsed as a .csv file, you will land on a new page with a preview of the data and a wide selection of import settings.
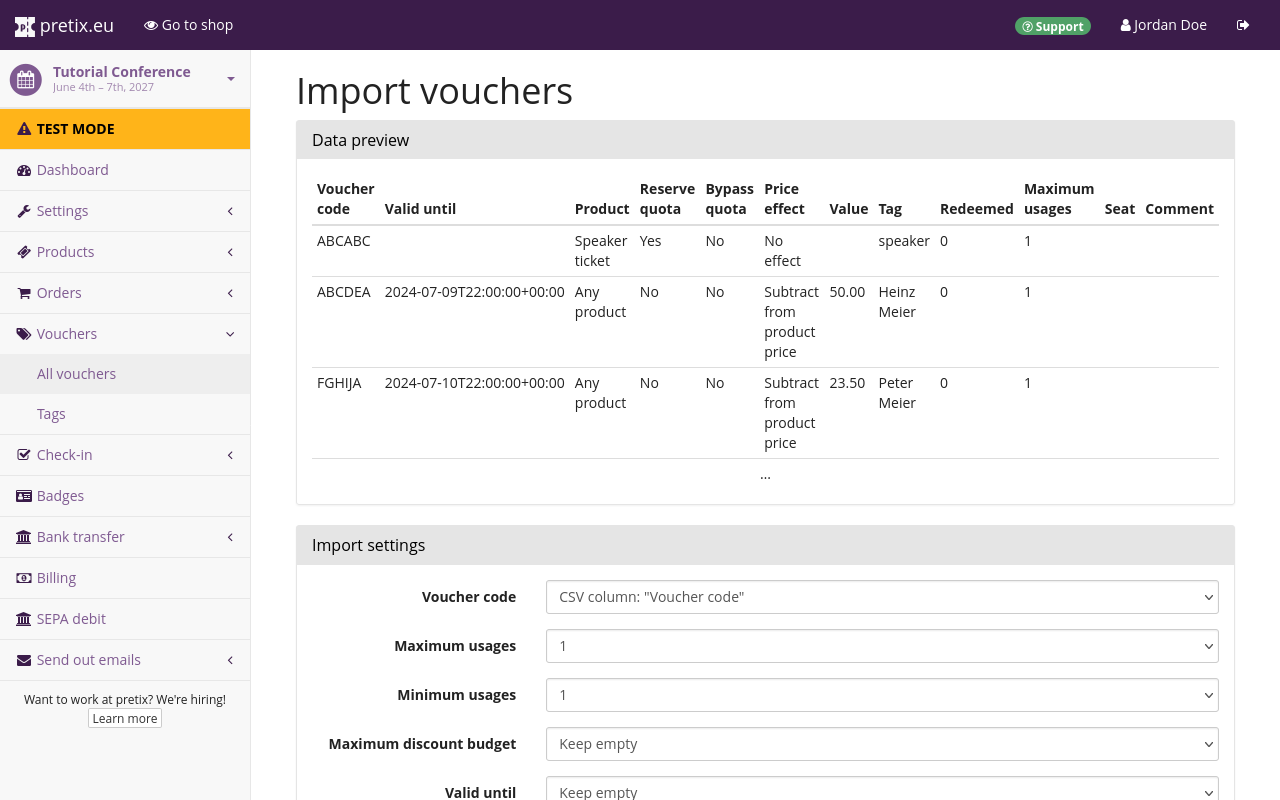
These settings are the same as the ones on the "Create multiple vouchers" page in the sections "Voucher details" and "Advanced settings". Only the options for generating the voucher codes and sending out emails are missing here. For each individual setting, you can specify a column from the .csv file.
The contents of that column will then be used to set the option for each individual voucher. If your .csv file does not have a corresponding column, you can instead use one of the default values. Once you click Perform import, pretix will attempt to parse the columns from the .csv file according to the settings you specified.
An error message will be displayed if any of the data in the columns does not fit the expected data type. If the import is successful, the vouchers will be created for the current event as specified and can be viewed and edited in the overview on the "Vouchers" page.
Downloading the full list of vouchers#
You can download the full list of vouchers for the current event by clicking the Download list button. Clicking that button will instantly start a download of a file named "vouchers.csv" to your device which can then be edited with a text editor or a spreadsheet editor. The vouchers.csv file will contain the following columns:
Voucher code, Valid until, Product, Reserve quota, Bypass quota, Price effect, Value, Tag, Redeemed, Maximum usages, Seat, Comment.
Applications#
As described in the introduction, vouchers have several useful applications. These applications will be explained in the following subsections.
Offering a limited discount#
You can create a voucher code for a limited discount to attract more customers to your shop. The validity of the voucher can be restricted to a limited timeframe, a certain number of uses, or a maximum discount budget. It is also possible to use a combination of these restrictions.
Navigate to navigation pathYour event then Vouchers and click the Create a new voucher button. Leave the automatically generated suggestion in the "Voucher code" field or provide your own.
If you want the voucher to apply only to one specific product, select that product in the "Product" field. If you want it to apply to all products in a quota, select that quota in this field. If you want the voucher to be able to be used for all products in your shop, leave the field empty.
The "Price effect" option gives you several different possibilities as to what effect the voucher should have on the price of the product. As an example, you could set "Price effect" to "Reduce product price by (%)" and set "Voucher value" to "10" for a 10% discount upon use of the voucher.
Uncheck the box next to "Show hidden products that match this voucher". Leaving this option checked while issuing vouchers for "All products" would mean that all hidden products are visible to a customer who is using the voucher.
If you want to limit the validity of the voucher to a certain number of uses, set the "Maximum usages" field to the upper limit of discounted purchases that you want to allow. If you do not want to set a limit, use a very high number such as 999999.
If you want to limit the validity of the voucher to a certain maximum budget, you can use the "Maximum discount budget" option. For instance, if you set "Maximum discount budget" to €1000.00 and the voucher gives the customer a flat €10.00, then the voucher will lose its validity after it has been used 100 times.
If you want to limit the validity of the voucher to a certain timeframe, set the "Valid until" option to the end of the limited time offer, for example the end of the following day.
Click Save once you are happy with your choices. You can copy the code from the overview of vouchers and include it in, e.g., a newsletter, a social media post, or print media.
Exclusive product availability#
You can use vouchers to make a product (or multiple products) only available to a select group of invited guests. This option is appropriate for cases in which you know the group of recipients beforehand and have a full list of their email addresses, e.g., members of a club, speakers at a conference, or VIPs who get an invitation.
If you want to restrict availability for a single product, navigate to navigation pathYour event then Products then Products and create or edit the admission product in question. Open the Availability tab and check the box next to "This product can only be bought using a voucher".
If you set the visibility toggle next to this option to "Hide product if unavailable" ( ), then the product will be hidden in your shop. It will only be displayed to customers who entered one of the voucher codes into the voucher field, or who landed in the shop by following one of the voucher links.
If you want to restrict availability for certain product variations, edit the variation and check the box next to "Show only if a matching voucher is redeemed". For product variations, it is not possible to make them available through a voucher only but still display them in your shop.
If you want to restrict availability for multiple products, take the steps described above for each product. A voucher can be set to affect the availability of a single product or of all products in a quota. Thus, it is necessary to create a quota, add only the products in question to it, and set the "Total capacity" so that it covers the number of emails you are planning to send out.
Regardless of whether you have set restricted availability for only one or for multiple products, it makes sense to send the voucher codes to your recipients via email. Navigate to navigation pathYour event then Vouchers and click the Create multiple new vouchers button. This process is described in detail in the section Sending out vouchers via email Generate the same number of voucher codes as people you are planning to invite. You can send multiple vouchers to the same email address using the "number" column in the list of "Recipients".
Under "Product", choose the product (or the quota, if there is more than one product) which you want to make available to the voucher holders. Check the box next to "Shows hidden products that match this voucher" at the bottom of the page. This option only has an effect if the visibility toggle of the product is set to to hidden.
When inviting staff members or VIPs, you may want to waive the cost for all add-on products that voucher holders select on top of their ticket. If you want to do that, check the box next to "Offer all add-on products for free when redeeming this voucher".
Check the box next to "Send vouchers via email" in order to display the email options. Enter the mail addresses into the "Recipients" field or use the more advanced method described in the section on sending out vouchers via email. Emails will be sent out as soon as you click the Save button.
Reserving tickets#
You can use vouchers to reserve products from a quota. This is useful if you need to ensure that a certain group of people gains access to your event, for example, guests invited to a concert by the performing artists. Navigate to navigation pathYour event then Vouchers, click the Create multiple new vouchers button, and set the number of codes to generate one voucher per member of the group in question.
Optionally, you may choose a descriptive prefix such as "GUEST-LIST-".
Set "Product" to your event's basic admission ticket, set "Price effect" to "Set product price to" and the voucher value to 0.00. This means that the voucher will entitle each holder to one basic admission ticket for free.
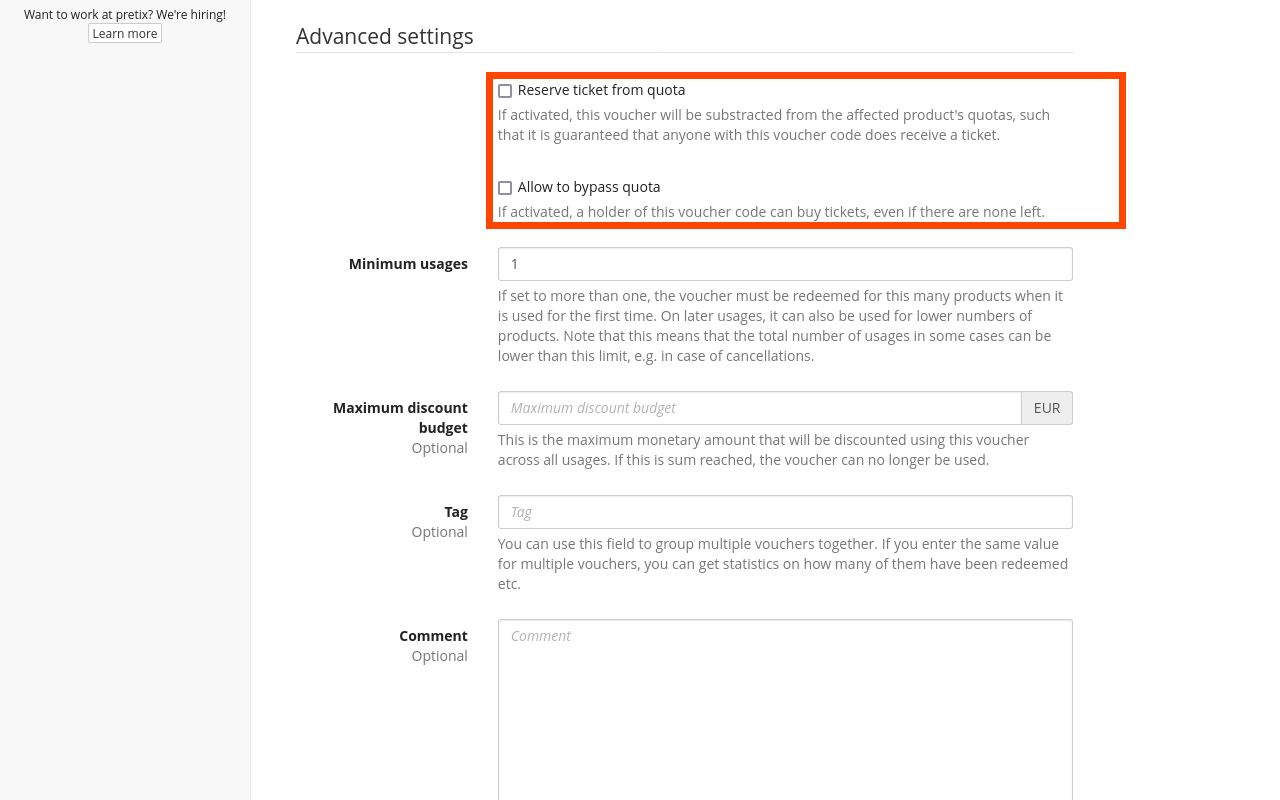
Check the box next to "Reserve ticket from quota". This means that a number of products equal to the combined maximum number of usages of all the vouchers you are creating will be reserved from the quota so that they cannot be purchased without a voucher. For example, if you are creating 5 vouchers that each have 3 usages maximum, then 15 products will be reserved from the quota.
Please note that this does not give voucher holders reliable access to products if you selected one of the "Any product in quota" options under "Product" and the products are part of more than one quota with limited capacity. You can still use this method without worrying about that if you select a specific product under "Product", or if the products in question are only part of one quota.
Bypassing a quota#
Another method for ensuring access to products for the voucher holders is allowing them to bypass quotas. This is useful if, for example, you have already sold most or all of the admission tickets to your event but want to make sure that a certain group of people can still attend.
Create one or multiple vouchers with settings according to your needs. Check the box next to "Allow to bypass quota". This gives voucher holders access to products even if all corresponding quotas are already sold out.
Note
Using the "Allow to bypass quota" option carries the risk of overbooking. We do not recommend using this feature if you are working with strict physical limitations such as the number of available seats, space at the event venue, or the number of meals that have been ordered.