Customer accounts#
pretix allows your customers to use your ticket shop without having to create an account. However, pretix also lets you enable customer accounts. Customer accounts have three advantages:
First, they allow your customers to store their personal data so that they do not have to enter addresses and attendee information on every purchase. Second, they allow you to interact with customers through their personal accounts, and not just through individual orders. Third, they allow you to grant memberships to your customers, which can then be used for season passes, special members-only offers, and reusable media.
Note
Customer accounts and memberships are not the same thing. Customer accounts are usually created by the customers themselves. Activating customer accounts is a prerequisite for access to the memberships feature. Having access to a customer account is a prerequisite for getting access to a membership.
Memberships are usually assigned to a customer account with the purchase of a product and can then be used for exclusive discounts and access to products.
This article tells you how to enable and manage customer accounts.
Prerequisites#
Customer accounts are handled on the organizer level. You need access to an organizer account if you want to enable customer accounts.
General usage#
Customer accounts are always tied to the organizer account. Once a customer has created an account while placing an order for one of your events, they will be able to log in and place an order through the same account for all events managed by the same organizer account. Creating a customer account for a purchase at one organizer does not create a customer account for a transaction with any other organizer.
It is not possible to activate or deactivate customer accounts on a per-event basis. It is also not possible to force customers to create an account. The option to place an order as a guest is always available.
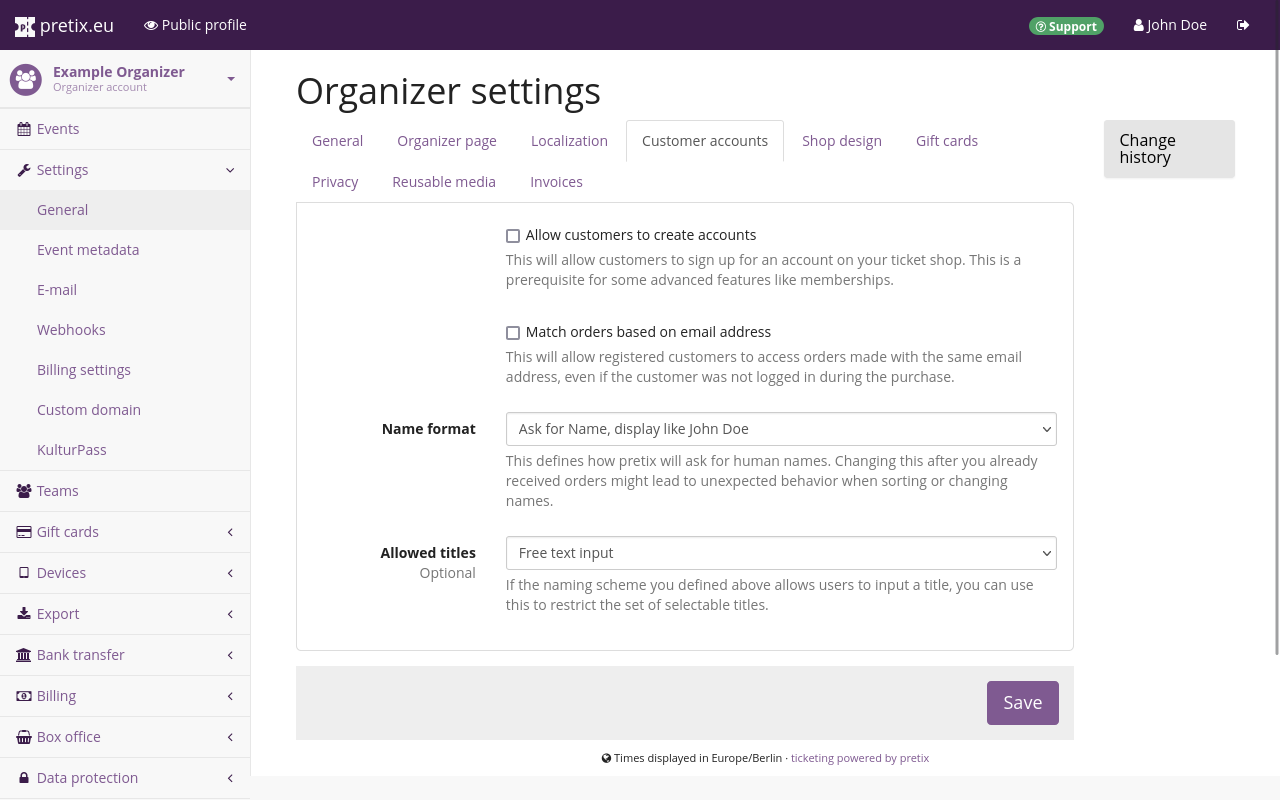
If you want to allow your customers to create accounts, navigate to navigation pathYour organizer then Settings then General, open the Customer accounts tab, and check the box next to "Allow customers to create accounts".
Checking that box makes another box appear that is checked by default: "Allow customers to log in with email address and password". Keep this box checked if you want customers to log in to your pretix ticket shop directly. Uncheck it if you want them to log in exclusively via an external single sign-on service.
By default, customers will be able to view and edit orders placed with the same customer account. If you check the box next to "Match orders based on email address", they will also be able to view and edit any orders that have been placed with the same email address without logging in.
Customer accounts from the customers' perspective#
From your customers' perspective, a pretix ticket shop is perfectly usable without creating an account. Giving your customers the option to create an account makes sense if you expect them to place orders repeatedly and to access and change their memberships, addresses, attendee profiles, account information, and password after placing an order.
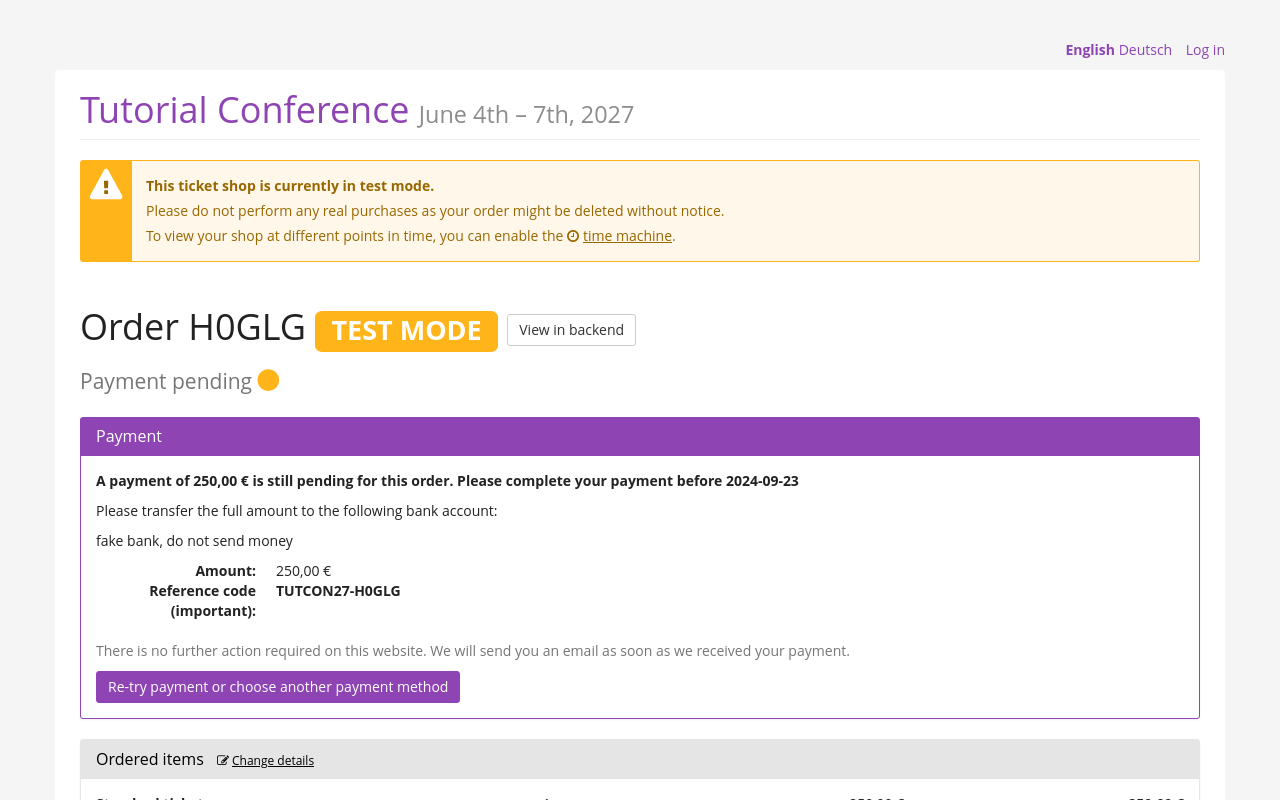
If a customer places an order without logging into a customer account or creating one, they receive an email with a URL. The URL points to a page on which they can make a payment, download their ticket, as well as change the details of their orders, shipping, and personal information. The URL is specific to that order.
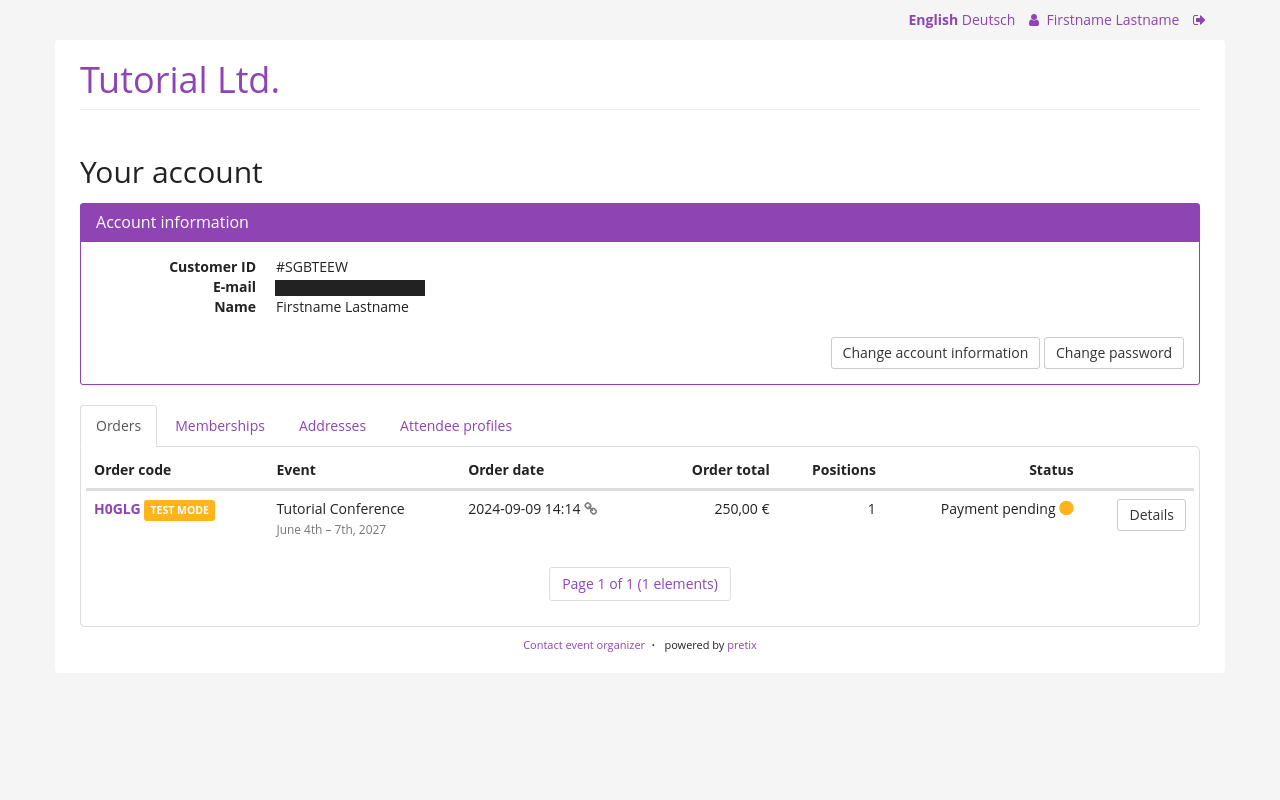
If the customer creates an account and then logs into that account, they will see an overview of their orders which they can view and edit individually just like described above. They will also be able to view and edit their memberships, addresses, attendee profiles, account information, and password.
Managing customer accounts#
Navigate to navigation pathYour organizer then Customer accounts then Customers. This menu option will only appear if customer accounts are enabled in the organizer account settings. The "Customers" page displays a list of all customer accounts known to your organizer account with their "Customer ID", email address, name, and optional "External identifier".
The page gives you the option to search and filter customer accounts as well as to create a new one with the Create a new customer button. pretix will automatically generate a "Customer ID" for every customer account. You can change this customer ID manually during creation. It serves as the account's unique identifier and cannot be changed after the account has been created. The identifier may only contain letters, numbers, dots, dashes, and underscores. It must start and end with a letter or number.
The only other mandatory piece of information for a customer account is the associated email address.
The customer can only log in to their account if the boxes next to "Account active" and "Verified email address" are checked. The "Verified email address" box will be checked automatically as soon as the customer clicks the link in the verification email or password reset email. This box can also be checked or unchecked manually. If the customer attempts to log in while this box is unchecked, they will be prompted to either click the verification link or to reset their password.
If you already have customer accounts in a different software and you need to connect them to the pretix customer accounts unambiguously, then it makes sense to fill the "External identifier" field with the unique identifier of the account from the other software. If you want to import, export, or sync data between pretix and another software, then it makes sense to fill this field automatically using an integration with the pretix API. Consult the pretix REST API documentation for further information.
Entries in the "Notes" field will only be visible to you and your team; they will not be visible to the customer.
Single Sign-On (SSO)#
"Single sign-on" or SSO refers to a setup that allows users to sign in to multiple systems (e.g. apps or websites) with a single set of login data. It makes sense to implement SSO if pretix is just one of multiple applications you are planning for your customers to use. This has the advantage of unburdening your customers from memorizing the difference between your various systems and keeping track of different usernames and passwords for them. With an SSO setup, your customers can use the same credentials for every interaction with your company or your brand.
You can use pretix as an SSO provider. Customers will be able to create a pretix account and then use that account for all other applications you connect as SSO clients with pretix serving as the source of truth.
You can also use pretix as the SSO client. If you are already using a different SSO provider that serves as the source of truth for your applications, you can connect pretix as an SSO client. This means that customers will be able to log into your pretix shop and make purchases there using your existing SSO setup.
All SSO support for customer accounts in pretix is currently built on the OpenID Connect standard, a modern and widely accepted standard for SSO in all industries.
Using pretix as an SSO provider#
If you want to use pretix as an SSO provider, navigate to navigation pathYour organizer then Customer accounts then SSO clients and click the Create a new SSO client button.
The checkbox next to "Active" is enabled by default. Disable it if you want to disable SSO integration with the client in question.
Enter an informative and unambiguous name in the "Application name" field, for example the name of the application or website for which you want to use pretix as an SSO provider.
Under "Client type", choose "Confidential" if the server-side application is able to store a secret that will be inaccessible to end users. For a client-side application such as a typical mobile app, choose "Public".
Your choice for the "Grant type" depends on the implementation of the OpenID Connect standard used by the application you are connecting.
Enter one or multiple URIs that the user might be redirected to after the successful or failed login into the "Redirection URIs" field.
Under "Allowed access scopes", check the boxes for which you want to grant access to the application.
Once you click the Save button, the client secret will be displayed at the top of the page. The client secret will only be displayed once. Copy and paste it to your application. You will also need the "Client ID" which will be displayed in a new field underneath "Application name".
If you need a new client secret, check the box next to "Invalidate old client secret and generate a new one" and click the Save button. The old client secret will not be usable anymore. The new client secret will be displayed in a green box at the top of the page.
Beyond the client ID and secret, the service you are connecting is also going to need your issuer URI. If you are using pretix Hosted without a custom domain, your issuer URI will be the address of your organizer's public profile without the final slash. For instance, the issuer URI of our Tutorial Ltd. with the organizer short form "tut" will be https://pretix.eu/tut.
If you are using a custom domain, then your issuer URI will be the custom domain preceded by "https://". For instance, if your custom domain is tickets.mycompany.net, then your issuer URI will be https://tickets.mycompany.net.
Technical details for using pretix as an SSO provider#
pretix implements the OpenID Connect Core 1.0 specification. A few optional parts that have no use within pretix are excluded. For example, encrypted tokens, offline access, refresh tokens, and passing request parameters as JWTs are not supported.
pretix implements the provider metadata section from OpenID Connect Discovery 1.0. You can find the endpoint relative to the issuer URI as described above, for example at https://pretix.eu/demo/.well-known/openid-configuration.
All three OpenID Connect Core flows are implemented:
- Authorization Code Flow (response type
code) - Implicit Flow (response types
id_token tokenandid_token) - Hybrid Flow (response types
code id_token,code id_token token, andcode token)
The response modes query and fragment are implemented.
pretix offers the following scopes: openid, profile, email, phone.
As well as the following standardized claims: iss, aud, exp, iat, auth_time, nonce, c_hash, at_hash, sub, locale, name, given_name, family_name, middle_name, nickname, email, email_verified, phone_number.
The various endpoints are located relative to the issuer URI as described above:
- Authorization:
<issuer>/oauth2/v1/authorize - Token:
<issuer>/oauth2/v1/token - User info:
<issuer>/oauth2/v1/userinfo - Keys:
<issuer>/oauth2/v1/keys
They follow the OpenID Connect and OAuth specifications without any special behavior. Please refer to those specifications for further information.
Using pretix as an SSO client#
If you want to use pretix as an SSO client, navigate to navigation pathYour organizer then Customer accounts then SSO providers and click the Create a new SSO provider button.
Choose a "Provider name" and "Login button label". The "Provider name" is used to refer to the provider internally in the pretix backend. The "Login button label" is used as the label for the login button that is displayed to customers in your shop. Under "Single-sign-on method", choose "OpenID Connect". Fill out the fields that are displayed after you selected "OpenID Connect" with the information from your SSO provider.
If you want your customers to log in exclusively via SSO and not create accounts via pretix directly, navigate to navigation pathYour organizer then Settings then General, open the Customer accounts tab, and uncheck the box next to "Allow customers to log in with email address and password".
Technical details for using pretix as an SSO client#
In order to use an SSO provider with pretix, it has to fulfill the following requirements:
- Implementation according to OpenID Connect Core 1.0.
- Published meta-data document at
<issuer>/.well-known/openid-configurationas specified in OpenID Connect Discovery 1.0. - Support for Authorization code flow (
response_type=code) withresponse_mode=query. - Support for client authentication using client ID and client secret and without public key cryptography.
Example: Using Google Accounts as an SSO provider for pretix#
If you want to use Google as an SSO provider for pretix, follow the instructions on OpenID Connect in the Google documentation. Open the Google Cloud backend and create a new client. During the creation process, under "Application type", select "Web application". Note down the "Client ID" and "Client secret" so that you can enter them in the pretix backend later.
Open the pretix backend and navigate to navigation pathYour organizer then Customer accounts then SSO providers and click the Create a new SSO provider button. Choose a "Provider name" such as "Google" and a "Login button label" such as "Sign in with Google". Fill in the following details:
- Single-sign-on method:
OpenID Connect - Base URL:
https://accounts.google.com - Client ID: Insert the ID you noted down during the client creation process in the Google backend.
- Client secret: Insert the secret you noted down during the client creation process in the Google backend.
For the next three fields, consult the documentation linked above under technical details. An example configuration might look like this:
- Scope:
openid email profile - Email address claim:
email - Identity claim:
sub
Click the Save button.
You will be taken back to the overview page titled "SSO providers".
Click the "Google" entry in the list.
Copy the value from the "Redirection URL" field.
It will look similar to, but not exactly like https://pretix.eu/tut/account/login/199/return.
Open the Google backend, edit your client, click to add a URL, paste the value into the field, and save the settings.